
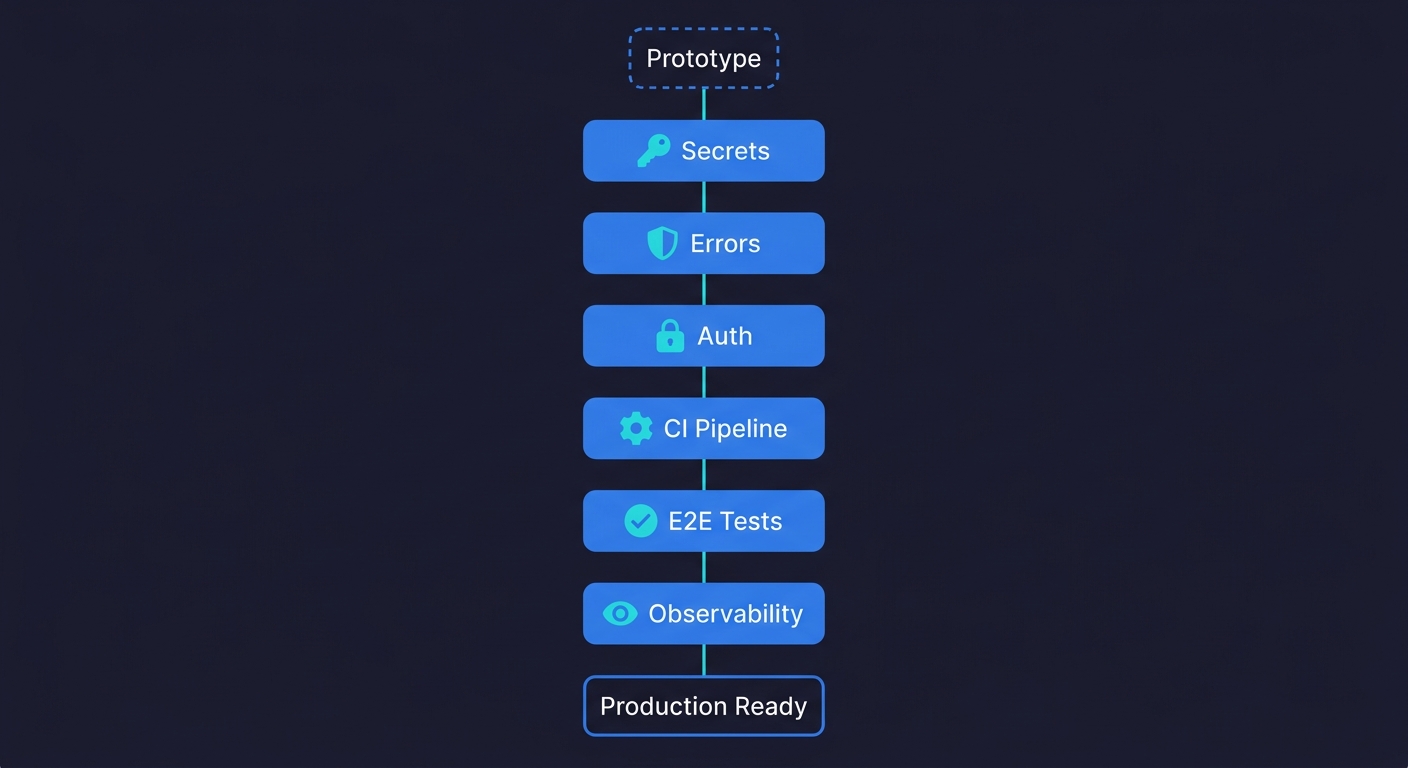
Making a vibe-coded app production ready means closing the gap between "works on my machine" and "safe to put in front of customers." The six steps are:
- Audit your secrets and environment variables
- Add structured error handling to every external call
- Lock down your authentication and authorization flows
- Set up a CI pipeline that runs on every push
- Add E2E coverage on your critical user paths
- Configure observability so you know when things break
Each step has a concrete verification. You know it worked because something measurable changed. Done in order over a weekend, they transform a prototype into something you can ship without lying awake at night.
You built something real. Users can sign up, the core flow works, and you have already shown it to people who want to pay for it. So you push to production. Then things start breaking in ways that never happened during development.
This is the vibe coding trap. The AI tools that make building fast are optimized for green-field speed, not production resilience. They don't add rate limiting. They don't set up monitoring. They don't think about what happens when two users hit the same endpoint at the same time. We assessed what production readiness actually means for vibe-coded apps and the gaps are remarkably consistent.
Making your vibe coded app production ready means filling those gaps deliberately. Not rebuilding from scratch. Just adding the six layers that vibe coding skips. (For the ongoing testing discipline to maintain quality after launch, see our vibe coding best practices checklist — this article is the one-time transformation, that one is the repeatable process.)
Step 1: Audit Every Secret and Environment Variable
This is where you start because it is the one that can hurt you before anyone else even uses your app.
AI coding agents are genuinely helpful at writing code. They are also completely indifferent to security hygiene. When an agent writes a database connection string, an API key call, or an OAuth secret, it often puts the value directly in the code to make the example work. You iterate on top of that code, and six commits later, that hardcoded secret is in your git history forever, even if you later move it to an environment variable.
The audit has three parts. First, search your entire codebase for patterns that look like secrets: anything that matches sk-, AIza, Bearer , password =, api_key =, or long alphanumeric strings assigned to variables with names like secret, token, or key. Tools like git-secrets or trufflehog automate this. Run them against your full commit history, not just the current branch.
Second, check that every secret that should be in an environment variable actually is. Open your .env file (or wherever you store them) and confirm the app loads from there. Then delete one of them and confirm the app fails with a clear error rather than silently using a fallback.
Third, make sure your .env file is in .gitignore and has been from the first commit. If it was ever committed before you added it to .gitignore, rotate every credential in it. Assume it is compromised.
How you know it worked: Run git log --all --full-history -- "**/*.env" and see nothing. Run a secret scanner against your full history and get a clean report. Delete a required environment variable and get an explicit startup error instead of strange behavior.
This single step is the difference between a prototype and a disaster. Vibe coding security risks are well documented and hardcoded credentials are the most common failure mode. Fix it first.
Step 2: Add Structured Error Handling to Every External Call
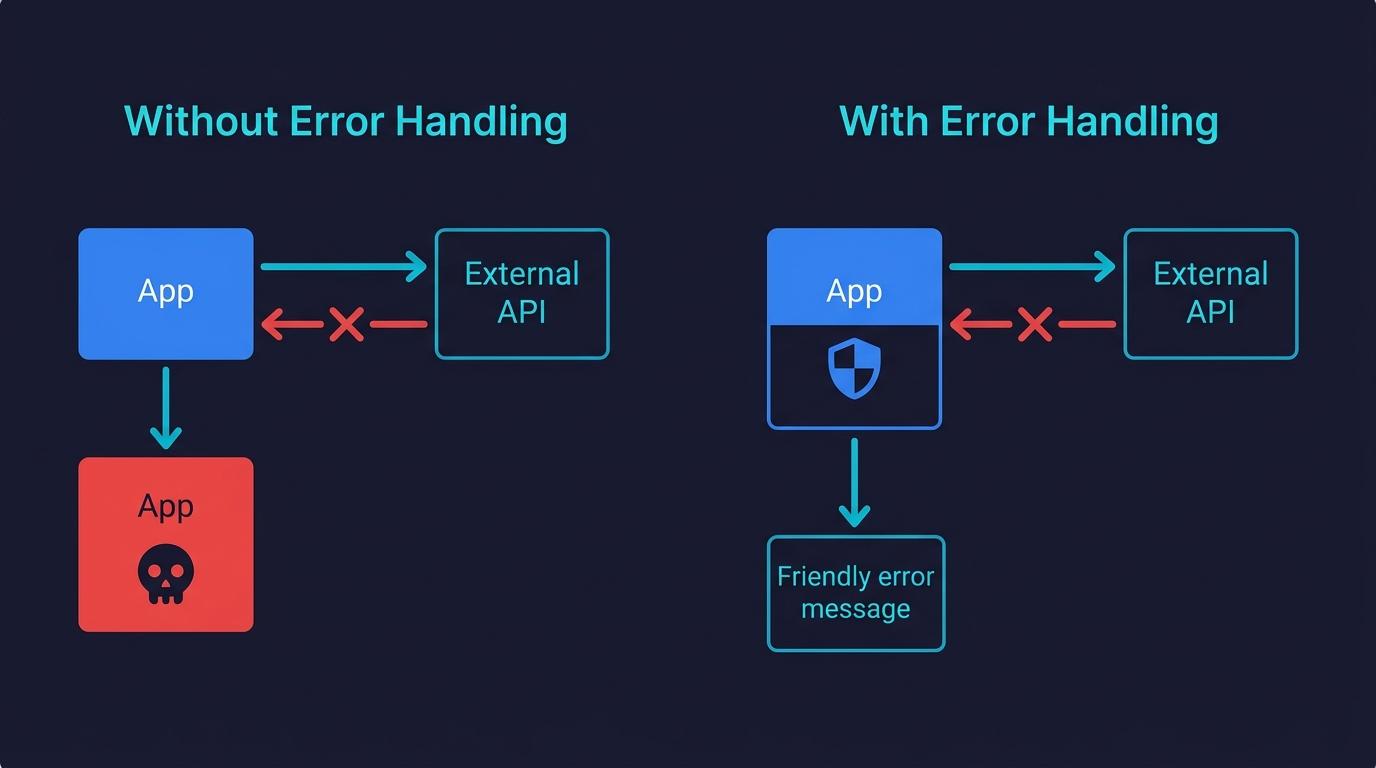
Your app calls external services. An AI agent, a payment processor, a database, an email provider, a storage bucket. Every one of those calls can fail. The question is what your app does when they do.
AI-generated code is optimized for the happy path. This is one of the most common quality issues in vibe-coded projects. The agent writes the success case because that is what you described to it. Error handling, if it exists at all, tends to be a generic try/catch that logs something and returns nothing useful. Under real traffic, this creates a class of bugs that are almost impossible to debug because they fail silently: the user sees a blank screen, the request hangs, or they get a 500 with no explanation.
The fix is methodical. Go through every function that makes an external call and verify three things. First, it has a timeout. If the external service hangs, your app should stop waiting after a defined period, not hang indefinitely. Second, it has explicit error handling that distinguishes between types of failures. A network timeout is different from a 401 unauthorized is different from a 429 rate limit. Handling them the same way is how you miss actual problems. Third, it surfaces a useful message to the user. "Something went wrong" is not useful. "We couldn't connect to the payment processor. Please try again or contact support at..." is useful.
The other half of this step is input validation. AI-generated code assumes inputs are what you described. Real users send malformed data, empty fields, strings where you expected numbers, and payloads that are three times larger than expected. Add validation at your API boundaries, before the data reaches any business logic.
How you know it worked: Kill your database connection mid-request and verify the app returns a useful error instead of hanging or crashing. Send a malformed payload to your API and verify it returns a 400 with a clear message instead of a 500. Stub an external API call to return a 429 and verify your app backs off instead of hammering it.
This is also where automated testing provides the earliest signal — a test that deliberately triggers a timeout or submits malformed input will tell you within seconds whether your error handling is actually wired up. Autonoma generates these adversarial tests alongside functional ones, so error handling coverage comes automatically with your E2E suite.
Step 3: Lock Down Your Authentication and Authorization Flows
Authentication is the area where AI-generated code is most likely to have a subtle, dangerous mistake. Not because the agent writes bad auth from scratch, but because auth logic is stateful and context-dependent in ways that trip up even experienced engineers.
The specific failures to check for in vibe-coded apps follow a pattern we see consistently. Role checks that are enforced on the frontend but not the backend, meaning any user who knows the API route can bypass them. Session tokens that never expire. Password reset flows that are vulnerable to email enumeration. Admin routes that check for a logged-in user but not for an admin user. Direct object references where any authenticated user can access any resource by changing an ID in the URL.
Go through each of these systematically. For role-based access, pick your most sensitive route and make an API call to it with a token belonging to a lower-privilege user. The request should be denied at the server level. For session expiry, check that tokens have an expiration and that your app validates it. For direct object references, log in as User A, get the ID of a resource belonging to User B, and try to access it. You should get a 403, not the resource.
The goal is not to rewrite your auth system. It is to verify that the access control rules you believe are enforced are actually enforced at every layer.
How you know it worked: Every sensitive API route returns 403 when called with an insufficient-privilege token. Accessing another user's resource by ID returns 403, not the resource. Expired tokens are rejected, not silently accepted.
Step 4: Set Up a CI Pipeline That Runs on Every Push
At this point, your app is more secure and more robust. The problem is that the next change you make could break all of it without you knowing. This is the core failure mode for vibe-coded apps at scale: every new feature is a regression risk because there is nothing automatically checking that the old functionality still works.
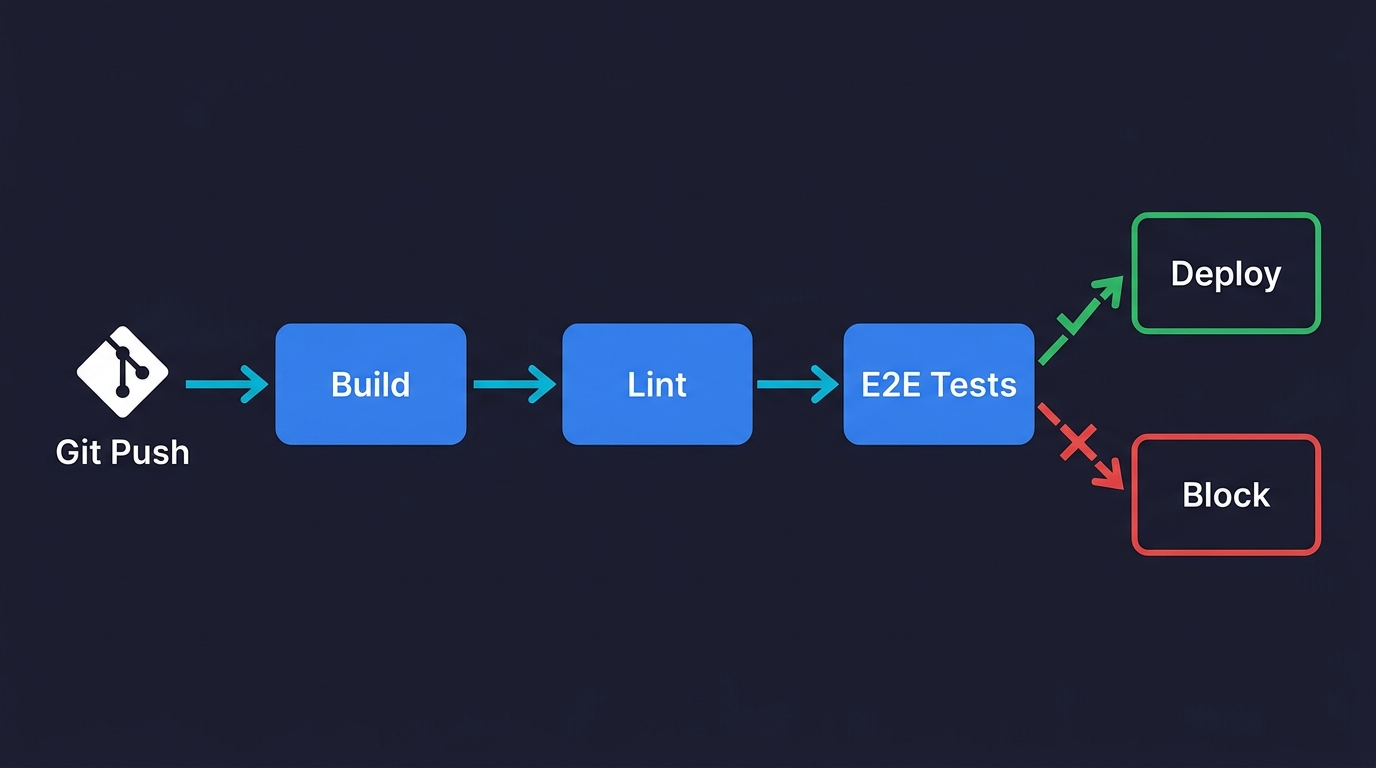
A CI pipeline running on every push solves this. It does not need to be complex. For a prototype moving toward production, the initial pipeline needs three things: a build step that confirms the app compiles without errors, a lint step that catches obvious code quality issues, and a basic smoke test that confirms the app starts and the most critical route returns a 200.
GitHub Actions is the lowest-friction option for most teams. A workflow file that runs on push, installs dependencies, builds the app, and runs a single health check is eight lines of YAML. The exact configuration depends on your stack, but the pattern is the same regardless of whether you are running Next.js, Django, Rails, or a Go API.
The key discipline is: if the pipeline fails, nothing ships until it passes. That constraint is what makes CI useful. Without it, you have a script that runs sometimes. With it, you have a gate.
Once the basic pipeline is running, add one more thing before moving to the next step: a preview environment that deploys automatically on every pull request. Vercel, Railway, and Render all support this out of the box. The ability to test a change in a real environment before merging it is worth more than any additional test coverage at this stage.
How you know it worked: Break something intentionally, push the commit, and verify the pipeline catches it before you merge. Open a pull request and verify a preview URL is generated automatically.
Step 5: Add E2E Test Coverage for Your Vibe-Coded App's Critical Paths
You have a CI pipeline. Now give it something meaningful to run.
The instinct at this point is often to write unit tests. Resist it. Unit tests are valuable eventually, but for a vibe-coded app moving toward production, they solve the wrong problem. Unit tests tell you that individual functions work in isolation. E2E tests tell you that your users can actually accomplish the things they came to your app to do. That is what matters when you are shipping.
Start by identifying your three to five most critical user paths. These are the flows where a failure would directly cost you money, users, or trust. For a SaaS app, that is usually: sign up and create an account, complete the core action your product exists to perform, and access or export the output of that action. For an e-commerce app: browse to a product, add to cart, check out. For an API-first product: authenticate, make the primary API call, receive a valid response.
Write or generate an E2E test for each of those paths. The test should simulate a real user: open a browser, navigate to the URL, interact with the UI, and verify the outcome. Tools like Playwright and Cypress work well for this. For a deeper look at testing approaches, see our guide on how to test a vibe-coded app.
If you built the app without writing tests and don't want to learn a testing framework, AI-native platforms like Autonoma take a different approach: connect your repo and agents analyze your routes and user flows to generate and run E2E tests automatically. When your code changes, the tests update themselves. For founders moving fast, this removes the biggest friction point between "working prototype" and "tested product."
How you know it worked: Break one of the critical paths intentionally and verify the corresponding test fails in CI. Fix it, push, and verify the test passes again. The pipeline should catch the regression before any user sees it.
Step 6: Add Observability So You Know When Things Break
Steps one through five reduce the probability of something breaking. Step six is what you do when something breaks anyway, because something will.
Observability means you have the information you need to understand what happened, when it happened, and who it affected. For a production app, that requires three things running before you open to real users.
The first is error tracking. Every unhandled exception in your app should be captured, categorized, and surfaced somewhere you will actually see it. Sentry is the standard choice. It takes about twenty minutes to integrate, captures stack traces automatically, and can alert you via email or Slack when new error types appear. The most important configuration detail: set up an alert for error spikes, not just individual errors.
The second is uptime monitoring. This is separate from error tracking. Your app might be returning errors without being fully down. But you also need to know when it is fully down, ideally before users start messaging you. A simple uptime monitor pings your app every minute and notifies you if it stops responding. Better Uptime, UptimeRobot, and Checkly all have free tiers that are sufficient for this.
The third is basic user analytics. Not for growth metrics at this stage. For debugging. When a user reports a bug, you need to be able to reconstruct what they were doing. PostHog, which we use ourselves at Autonoma, captures user sessions and events and is easy to self-host if you have data residency requirements. The minimum useful configuration is capturing page views, key user actions, and any custom events around your critical flows.
How you know it worked: Trigger an intentional error in your app. Verify it appears in Sentry within a minute. Take your app down for thirty seconds. Verify your uptime monitor alerts you. Confirm you can view a user session replay in your analytics tool.
What a Production-Ready Vibe-Coded App Looks Like
A vibe-coded app that has completed these six steps is meaningfully different from what it was before. Secrets are out of the codebase and the git history is clean. External calls fail gracefully instead of silently. Auth rules are enforced at the API level, not just the frontend. A CI pipeline catches regressions before they reach users. E2E tests cover the flows your business depends on. Observability tells you when something breaks and what broke.
That is not perfection. It is not 100% test coverage or a formal security audit or a disaster recovery runbook. Those things matter eventually. But they are not what separates "I'm nervous about this" from "I'm comfortable putting this in front of customers."
If you used the production readiness assessment and found your app was not ready, these six steps are the path to ready. Pair them with ongoing vibe coding best practices and you have both the transformation and the discipline to maintain it.
The hardest part, in practice, is not any individual step. It is the E2E testing step, because writing test scripts takes time and expertise that most founders who vibe-coded an app do not have. That is exactly why Autonoma exists — connect your repo and get coverage across your critical paths without writing or maintaining a single test file.
Your app deserves guardrails. This weekend is a reasonable time to put them in.
| Step | Action | Verification |
|---|---|---|
| 1. Secrets | Remove hardcoded credentials, rotate exposed keys | Secret scanner returns clean on full git history |
| 2. Error handling | Add timeouts, typed errors, input validation | Kill DB mid-request and get a useful error, not a crash |
| 3. Auth | Enforce access control at API level, not just frontend | Low-privilege token gets 403 on sensitive routes |
| 4. CI pipeline | Build, lint, and smoke test on every push | Intentional break is caught before merge |
| 5. E2E tests | Cover 3-5 critical user paths | Breaking a critical path fails the test in CI |
| 6. Observability | Error tracking, uptime monitoring, session analytics | Intentional error appears in Sentry within a minute |
Making a vibe-coded app production ready requires six steps done in order: audit and remove hardcoded secrets from your codebase and git history, add structured error handling to all external service calls, verify authentication and authorization are enforced at the API level, set up a CI pipeline that runs on every push, add E2E test coverage on your three to five most critical user paths, and configure observability with error tracking, uptime monitoring, and user analytics. Most founders complete the full process in a weekend, roughly 8 to 12 hours of focused work.
Most founders complete all six steps in a weekend, roughly 8 to 12 hours of focused work. Steps 1 through 3 (secrets audit, error handling, auth review) take 2 to 4 hours combined. Setting up CI takes 1 to 2 hours depending on your stack. E2E test coverage on three to five critical paths takes 2 to 4 hours if you write the tests manually, or under an hour with tools like Autonoma that generate tests from your codebase. Observability setup takes about 1 hour. The steps are ordered so that each one builds on the previous one, so it is best not to skip ahead.
Steps 1, 3, and 6 require minimal coding — they are mostly configuration and verification. Step 2 (error handling) and Step 4 (CI setup) require some comfort with code, but both have well-documented templates for common stacks. Step 5 (E2E testing) is the most technically demanding if done manually. Tools like Autonoma remove the coding requirement for this step by reading your codebase and generating tests automatically, which makes the full six-step process accessible to non-engineers who can navigate a terminal and read a config file.
Step 1 (secrets audit) is the most critical security step and should never be skipped or delayed. Hardcoded API keys and credentials are the most common and most damaging security failure in vibe-coded apps. Unlike most other vulnerabilities, a leaked secret can be exploited before your app has any users — bots continuously scan public repositories for credential patterns. Step 3 (auth and authorization review) is second in importance, particularly checking that role-based access control is enforced at the API level and not just the frontend.
The best tools for vibe-coded apps are ones that minimize the manual scripting burden. Autonoma is the most hands-off option — it reads your codebase and generates tests from your routes and components automatically, with no test scripts to write or maintain. Playwright and Cypress are strong choices if you want to write tests yourself and have some engineering comfort. For founders with no coding background, Autonoma is the practical choice because it removes the friction of test authoring entirely.
A vibe-coded app typically needs dedicated QA attention when it reaches one of three thresholds: handling payments or sensitive user data, scaling past a few hundred active users, or reaching a pace of change where the risk of regression is high. Below those thresholds, the six-step framework in this article plus automated E2E testing is sufficient for most teams. Above them, a QA engineer or a more formal quality engineering process adds meaningful risk reduction that automated tools alone cannot fully replace.


